Testing an Intel CPU for HAV Support
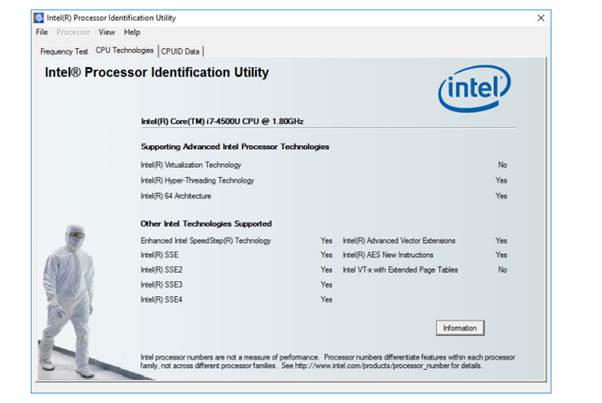
If you couldn’t do Exercise 8-1 because you didn’t have a supported OS, but you do have an Intel CPU, try this exercise instead to collect the same type of information via an Intel utility.
1. Using your web browser, navigate to http://tinyurl.com/zoyvqc3. (Or, if that link doesn’t work, go to https://downloadcenter.intel.com/download/7838/Intel-ProcessorIdentification-Utility-Windows-Version.)
2. Click the pidenu44.msi button to download the utility.
3. Run the downloaded file to install the utility. Then run the utility.
4. On the CPU Technologies tab in the utility, check the Intel Virtualization Technology setting.

5. If the setting is No, look in BIOS setup to see if there is a setting you can change to enable virtualization. Otherwise you will need to use a hypervisor that does not require HAV for the OS version you want to install .More on that later in the chapter.
Q38
Enabling Hyper-V Manager
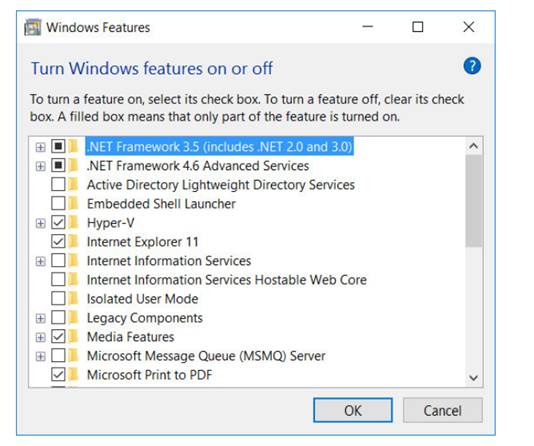
Some editions enable Hyper-V Manager by default; others don’t. In this exercise you will check for Hyper-V, and enable it if necessary. You’ll need 64-bit Windows 8.1 or 10 Pro or Enterprise.
1. Click Start, and type Hyper-V in the Search box. If Hyper-V Manager appears in the search results, click it to start the application, and you’re done. Go on to Exercise 8-4. Otherwise proceed to Step 2.
2. Right-click the Start button and click Control Panel. Then choose Programs | Turn Windows Features On or Off.
3. Check the Hyper-V check box and click OK.
4. Follow the prompts to set up Hyper-V and then click Close.

Students succeed in their courses by connecting and communicating with an expert until they receive help on their questions

Consult our trusted tutors.